Inspire your kids to get hands-on by scientifically discovering the answers to their questions. The science fair allows kids to follow their curiosity to better understand the world around them.
Go beyond asking questions. Your young scientist will design a science fair project to explore, test, and actually answer their questions. With a science fair on the horizon, the next time your child asks, “Why?”, you can say, “Let’s find out together!” Read on for tips on how to design a science fair experiment worthy of proud display. And when you’re ready, check out our chemistry supplies and biology tools to get your student started!
How to Design a Science Fair Project:
Ask, Experiment, Repeat
To get started, get familiar with the scientific method. For every grade and experience level, the scientific method is the standard for scientific discovery. The scientific method is a problem-solving process used during experiments. It can be modified according to the age and ability of students and also to develop particular skills.
1. Designing a Science Fair Project: Ask a Question
 What does your child or student wonder about? Do they like plants, animals, stars, chemistry, robots? Use their natural curiosity to help them pick a focus area. Furthermore, science fair committees should provide guidelines for acceptable project categories. For age appropriate science fair ideas get inspired with:
- Science Fair Projects for Elementary
- Science Fair Projects for Middle School
- High School Science Fair projects
Now, with a chosen topic at hand, help your student do some research to come up with a specific “problem” or question that he or she wants to answer. Make sure the question is precise, safely investigated with available equipment, and quantifiable through experimentation.
An example: How does lack of sunlight affect the growth of bean plants?
2. Designing a Science Fair Project: Form a Hypothesis
Armed with a solid question, your student is ready to make an educated guess, or prediction, about what will happen when she conducts an experiment to answer that question. This prediction is her hypothesis. Have her write it down and be ready for confirmation of her suspicion—or, conversely, complete surprise!
An example: A bean plant receiving less light will be shorter, thinner, and slower to produce buds than bean plants receiving an adequate amount of light.
3. Designing a Science Fair Project: Conduct an Experiment
Now it’s time for the hands-on part of your student’s science fair project—the experiment! This is when your child gets to roll up his sleeves and test his hypothesis.
Establish a control
A control is used as a standard of comparison for checking the results of an experiment.
An example: For the bean plant scenario, the control would be plants receiving a normal amount of light.
Choose a changing variable
In order to get accurate results for an experiment, a scientist must control as many variables as possible. Choose just one variable to change and test.
An example: For our bean plants, the changing variable is the amount of light each plant receives.
Choose constant variables
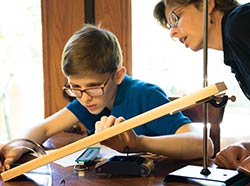 Your student’s constant variables will remain the same for all test subjects. In this way, he or she prevents other changing variables from throwing off data.
An example: To test the effect of light on bean plants, be sure each plant is treated exactly the same except for the amount of light given to each. (e.g. Water each the same amount, plant each seed at the same depth, and make sure to use the same kind of soil for each.)
Use multiple test subjects
 Using too few test subjects in an experiment can skew results, since other factors than just the changing variable can affect outcomes. On the other hand, when experiments use an adequate number of test subjects, results can be averaged to reveal consistent patterns.
An example: With our bean plants, six would be better than three. Use two plants as the control (in case one doesn’t survive) and give them full sunlight. Cover two with a box for two hours during the sunny part of the day, and cover the other two with a box for six hours each day. With two plants receiving each light variation, results will be stronger.
Record data
Make sure your child takes careful and detailed notes about his procedures, observations, and measurements. Write down daily or weekly observations in a notebook, sketch or photograph the stages of the experiment, and use graphs to show how results developed over time. Encourage your scientist to be neat and organized since these records will likely be used in the science fair presentation. Find tips on using a science notebook here.
 4. Designing a Science Fair Project: Analyze Data and Report Conclusions
Finally, the results are in! Once your student completes his or her experiment, it’s time to take all that hard work and answer that initial question.
Did the experiment support the hypothesis? If so, how (be specific)? But if not, it’s not a failure! Your scientist now has valuable information that can lead to further experimentation. Change a variable, conduct another experiment, and record more data until a conclusion can be reached.
5. Designing a Science Fair Project: Communicate Results
You helped your student ask a question, form a hypothesis, and design a science fair experiment to find an answer. All that hard work is worth talking about! Communicating results at the actual science fair occurs through two avenues: the final report and the display board. Find tips below.
For more resources for a successful science fair, check out our Complete Field Guide to the Science Fair resource or download our Free Science Fair eBook.


