Please note: we do not recommend this project for those with allergies to mold (including penicillin) or with severe asthma.
The easiest way to grow mold is on a piece of bread. Any preservative-free bread that is soft will work well. Bread with preservatives in it will take much longer to form mold. Leave the bread in the open for about an hour so it is exposed to contaminants in the air. Place the bread in a ziplock bag, and sprinkle water over it so it is damp. Seal the bag, leaving some air inside. Place the bag in a dark, warm place, away from other food items. A kitchen cupboard close to the stove may be one option. Or you could place it next to a window, with a bowl or plate covering it from the light. Mold will grow best in a moist environment. Mold should start forming in 2-3 days, but will take a week or more to get a good sample.
Check on the piece of bread every few days, and add more water if it is becoming dried out. Avoid opening the plastic bag as much as you can. If you touch the bread, be sure to thoroughly wash your hands afterwards. When sufficient mold has formed, you can prepare a slide and examine it under the microscope (student microscopes work well for this). You will need a sample that is about one inch across.
What You Need:
- Mold sample
- Plain glass slide
- Cover slip
- Water
- Methylene blue (optional)
- Disposable gloves
Safety Note: When handling mold, it is very important to cover as much skin as you can, and to wear gloves. Mold is an allergen and can be toxic. Working with mold as you are in the experiment typically only affects the very young or very old, or those with severe immune problems, but it is important to take precautionary measures (such as gloves) and to not do this project if you have allergies or asthma.
What You Do:
1. Place a drop of water in the center of the slide, using an eyedropper if you have one, or the tip of a clean finger. You can use solution of methylene blue instead, which is a microscope stain, and makes the sample easier to see by coloring certain parts of the mold cells.
2. Using a toothpick, scrape some of the mold off, and place it on the drop of water.
 3. Take the cover slip and set it at an angle to the slide so that one edge of it touches the water drop, then carefully lower it over the drop so that the cover slip covers the specimen without trapping air bubbles underneath.
4. Use the corner of a paper towel to blot up any excess water at the edges of the cover slip.
5. View the slide with a compound microscope, starting with a low objective.
About molds:
Did you know molds are actually fungi? Fungi are found in all sorts of environments, and some are helpful, while others can be harmful. Mushrooms are actually a type of edible fungi. Mold is certainly a nuisance on food, but some antibiotics have been made from mold similar to the kind you grew.
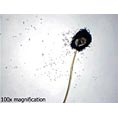
The colorful growth on the bread is made of connected thread structures called hyphae. These form a mold colony which was started by a single mold spore. The hyphae may look soft and fuzzy, or it could be very colorful. By looking at the hyphae under a microscope, you will be able to identify what kind of mold it is.
 Rhizopus feeds on starch or sugar, making it a common mold on bread. This type of mold may start off as white hair-like structures and eventually will form solid black spots. Under the microscope, Rhizopus appears as short strands with oval-shaped heads, looking like a balloon on a string. The head is where the spores of this type of mold are contained.
Aspergillus is another mold commonly found on food items, especially grains. It is a typically a bluish green color, with a thin ring of white around each colony. Some species of Aspergillus are black in color. You can identify this type of mold by making a slide and viewing it under the microscope. It has a thin branch-like structure, with heads that look like blooming flowers, and release spherical spores.
Penicillium, which is where the powerful antibiotic Penicillin comes from, can be blue-green or gray, often with a fuzzy white edge. This type of mold is common, and often looks like Aspergillus with the naked eye. If you examine it under a microscope, you will see that the head has thinner structure than Aspergillus, with several strand segments branching out from the main strand. At the end of each segment of the head you should be able to see small spores.
Clean-up: When the experiment is finished, put the bread and anything that touched it (including the gloves and apron) in a heavy-duty plastic zip lock bag, and throw it away. The slide will not be permanent, and should be disposed of as well. Clean the area you were working in thoroughly with bleach wipes (such as Clorox) or soap and water.