

DNA Extraction Kit, economy
$15.95

Do a fun spin on the classic baking soda and vinegar reaction! You can use any kind of gummy candy, but gummy worms will look the most like eels as they twist and squirm.
Pour vinegar into the other glass. Drop a baking-soda-soaked worm into the vinegar.
At first, nothing appears to happen. Then, bubbles start to form on the surface of the worm. The worm starts to move. After some time, the reaction stops and the worm stills. The gummy worms wiggle because a chemical reaction between baking soda (sodium bicarbonate) and vinegar (weak acetic acid) produces carbon dioxide gas. The tiny gas bubbles released by the reaction stick to the body of the gummy worms, eventually merging into bubbles big enough to float part of the worm. If the gas bubble detaches, it floats to the surface while that part of the gummy worm sinks back down.
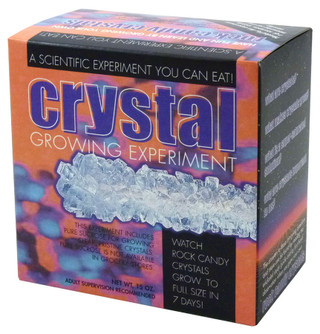
Salt is an naturally-occurring mineral and a chemical compound with amazing properties. These properties enable salt to be used in everything from preserving food to making it taste better. Epsom salt is primarily used for health reasons. People use it to make soft water for relaxing, treat constipation, and sore muscles. You can use it to make Epsom salt crystals!
Usually it takes several days to grow crystals. However, this super-easy recipe gives you a cup full of needle-like Epsom salt crystals in just a few hours!
1. In the beaker, stir 1/2 cup of Epsom salts with 1/2 cup of very hot tap water for at least one minute. This creates a saturated solution, meaning no more salt can dissolve in the water. (Some undissolved crystals will be at the bottom of the glass.)
2. Add a couple drops of food coloring if you want your crystals to be colored.
3. Put the beaker in the refrigerator.
4. Check on it in a few hours to see a beaker full of epsom salt crystals! Pour off the remaining solution to examine them.
Epsom salt is another name for the chemical magnesium sulfate. The temperature of the water determines how much magnesium sulfate it can hold; it will dissolve more when it is hotter.
Cooling the solution rapidly encourages fast crystal growth since there is less room for the dissolved salt in the cooler, denser solution. As the solution cools, the magnesium sulfate atoms run into each other and join together in a crystal structure.
Crystals grown this way will be small, thin, and numerous. Left undisturbed, the crystals should last months or more!
Deoxyribonucleic acid (DNA) is a chemical found in the nucleus of cells that contains the blueprint for the development and function of living organisms. It’s compared to a set of blueprints since it contains the instructions on how to build cells. The instructions are divided into segments along a strand of DNA and are called genes.
Genes provide the code for the production of a protein and control hereditary characteristics such as eye color or personality behaviors. Proteins determine cell type and function, so a cell knows whether it is a skin cell, a blood cell, a bone cell, etc., and how to perform its duties.
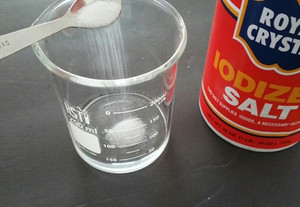
Create a saline solution in a beaker by adding two lab scoops of salt to approximately 25 ml of distilled water.
Stir until the salt is completely dissolved. Pour the saltwater into the paper cup.
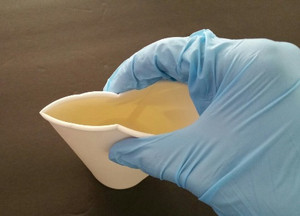
Without swallowing, drink a mouthful of the solution from the paper cup and swish it back and forth for at least 30 seconds, occasionally scraping your teeth along the inside of your cheeks as you do. It’s best to do this with a clean mouth, i.e. not right after lunch. Spit your mouthwash solution back into the cup. Then bend the cup into a sort of spout.
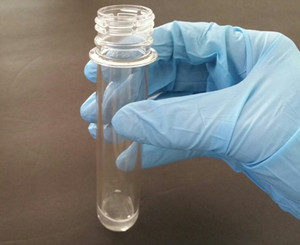
Pour the mouthwashed solution into the test tube until it fills about one-half inch of the bottom of the test tube. Carefully add two drops of the liquid soap.
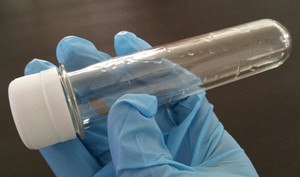
Tilting the test tube approximately 45 degrees, use the pipette (or dropper on the alcohol bottle) to add 20 drops of the chilled alcohol so it slides down the test tube without disturbing the solution. Since it’s less dense, the alcohol will sit atop the mouthwash and soap solution. Tightly put the cap on the test tube and very slowly and gently tilt it upside down then right side up three times. Do it carefully so as not to make bubbles.
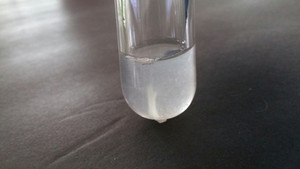
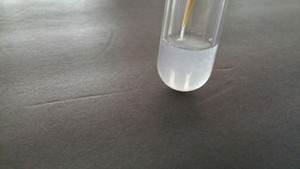
Let the test tube sit undisturbed in an upright position for one minute. At this point, you should begin to see a milky white thread, possibly interspersed with bubbles, appear between the solution and the alcohol. That’s your DNA! After several minutes, the DNA should be suspended in the alcohol layer.
If you wish, insert your skewer or stir rod into the test tube and gently wind the DNA around it. To save it, carefully scrape it into the small vial with a few drops of alcohol. Stored in the freezer, you can preserve your DNA almost indefinitely!
DNA stands for deoxyribonucleic acid (DNA) and it’s a molecule found in the nucleus of plant and animals cells. Passed from one generation of living organisms to the next through reproduction, DNA contains the blueprint for development, survival, and reproduction.
It’s compared to a set of blueprints since it houses the biological instructions that tell an organism how to build cells and what role they’ll play. Sometimes DNA’s structure is described as a twisted ladder that scientists refer to as a “double helix.”
The rungs of DNA are made from four different types of nitrogen-containing bases paired together through hydrogen bonds: adenine (A), thymine (T), cytosine (C), and guanine (G). Adenine and thymine connect to each other and cytosine and guanine connect to each other.
The sides of the ladder, also called the backbone of the DNA molecule, is made from an alternating pattern of phosphate, sugar, then phosphate again. Together, this grouping of a phosphate, sugar, and nitrogenous base makes up a subunit of DNA called a nucleotide, a sort of chemical building block.
But how can a molecule hold information? The base sequence determines the biological instructions that will be passed on through a DNA strand. These instructions are divided into segments along a strand of DNA and are called genes.
Genes provide the code for the production of a protein and control hereditary characteristics, such as eye color or personality behaviors. Proteins determine cell type and function, so a cell knows whether it is a skin cell, a blood cell, a bone cell, etc., and how to perform its duties.
When you swished the saltwater around in your mouth and scraped your teeth along the inside of your cheek, you were also collecting cheek cells. The salt helped them clump together.
The degreasing agents in the soap worked to break down the cell membrane to release the DNA, which is housed inside the cell’s nucleus. Gently mixing the soap and mouthwash solution ensured you didn’t break up the DNA clumps too much. The rest of the cheek cells remained in the saltwater-soap solution.
The strand of clumped together DNA would have eventually dissolved in the saltwater, but since it’s not soluble in alcohol, it precipitates out where the liquid layers meet.